Monday, August 20, 2012

Beautiful Nature in My Own Backyard!

So one of my new neighbors was telling me about how she loves photography and when someone asked her take photos of them, she used some areas of my backyard to do it. I have to say, I love my backyard. It hasn't been cleared out or landscaped in a few years, but it does have that rustic, old, falling down nature. Here are some pictures of what I love to see when I look out my back window.


I love how the ivy looks in my yard, but they aren't the most ideal plant to keep out of certain areas.


I don't know who this is or if the business is still going but it was so cool when we cleared out the masses of bushes around the fence and found this sign still attached to the fallen fence.


This mailbox was used to keep bird feed for the previous homeowner.


A fake owl hanging from the tree! The thing is I actually do have lots of owls that I hear every day! Maybe they think this is a real owl too!

I hope you love the pictures and nature in my yard as much as I do!

-Brittany-


Saturday, August 11, 2012

Pillows For Any Room!

I just posted 2 new pillows on my Etsy account that I thought I would share with you. 


The nice thing about white pillows is that they can be used in any room of any color and any style. I love how these pillows show their pattern by their shininess and their softness. They are so comfortable! Also, the nice thing about this pattern is that it can be used in any direction. 


Visit my Etsy page for all my listings!


-Brittany-

Sunday, August 5, 2012

Breakfast Room Design


As I think I said in one of my earlier posts, I recently bought a house and moved in after about a month of painting and cleaning and updating. I love the results so far and am continuing to work on the house. I thought I would show you one before and after since I am pretty sure this room is completely done now. 


This is my breakfast room as it looked when I moved in. It had old wallpaper that if you look really closely in the picture near the right of the back door, you can see that the wallpaper is stained well enough that you can see where pictures used to hang. Also, its not that I don't like wood paneling, but this house has a ton of it. And since the kitchen is right next to it and the kitchen cabinets are about the same color as the wood paneling, it makes the room look darker and more closed in. The house is 49 years old and so is most of the finishes in it, including the laminate floors in the kitchen. They weren't bad looking, but the seams were coming up. 

Now here is the after of this room. 


As you can see, I added hardwoods in the areas of the house that did not have any. I actually painted over the wallpaper because it was stuck on so well. It took quite a few coats of paint but it looks great! I painted all of the wood doors, paneling, and trim in a gloss white to lighten up the room and match the rest of the house trim work. The laundry room doors are still those louvered swinging doors but they are painted white (they were off the hinges in this picture). Which by the way I love my laundry room! It has the washer and dryer on the left as well as a space for a refrigerator, and on the right it has a folding area, desk, and space for my sewing machine and tons of storage all over! I did leave the laminate floors in there because you always want to have something durable in a laundry room since you never know when a washer or refrigerator might overflow or leak and that would be horrible if it ruined your floors. Getting back to the kitchen, I did leave the wood shelf so that some of the wood from the kitchen was continued into the breakfast room and didn't seem like the rooms were completely separate. My final touch in the room was to add roman shades. A kitchen already has so many hard surfaces that it is important to break up those surfaces with something soft. I chose roman shades because they are easy to maintain and can be pulled out of the way. The colors I chose in the roman shades include browns that are similar to the floors and the cabinets in the kitchen, and also incorporate a blue to pull it from the table that I have. You also may notice that my chairs don't match. I did that on purpose. They are all ladder back chairs but are different because I always have liked the look of different chairs at a table. It adds interest. I know its not for everyone but its what I like. 

Here are a few examples of other tables with different styles of chairs:


Happy Designing!

-Brittany-


Sunday, July 29, 2012

So my life has been really crazy lately. I just recently moved into my new house that I bought. I am so excited about it. After I bought it, I had to do a little updating and remodeling before I could move in. So this past month has been a whirlwind with the house. I will be putting up some before and after photos soon. But one thing I have gotten accomplished is putting up two new pillows for sale on Etsy. They are very pretty and and if I had room I would keep them myself! Check them out!


-Brittany-


Saturday, July 21, 2012

Etsy

I'm so excited because I had my first pillow sale on Etsy! Keep looking on my Etsy account for more posts of pillows which I have done and should be posting in the next day or two!
-Brittany-

Saturday, June 23, 2012

Pillows with Inserts

I have always made pillows that I could easily stuff and close up. I do like the clean look of these pillows because I can make the seams all look the same so you can't tell what side is up or down unless it has a distinct pattern. But this time I made pillows with an open slit in the back for the owner to take the pillow forms in and out if necessary to clean it. This is also a great solution for those who might be more rough or dirty with their pillows. Here is the pair! 


I love this fabric! It has the shiny gold quality that almost looks like it was hand-painted although I believe it was stamped. Then it also has the natural quality of linen and a very pretty green background color. 
These pillows are now available on my Etsy page!
-Brittany-

Sunday, June 17, 2012

Hey! So life has become a little crazy lately! I switched jobs and moved to South Carolina. I'm now an Interior Designer at an Architecture, Interior Design and construction company. I'm learning a lot about how buildings and homes are made such as when I draw sections of walls and ceilings and foundations and how they all connect. 

I haven't been able to do as much crafts as I would like to have but I have been able to complete some pillows that I just listed on Etsy! Keep up with my Etsy page as I should be adding more and more to it in the near future. I am very proud of the pillows I made so I hope you like them! Here are the pictures of them and here is the link to my Etsy shop: brittcustomdesigns


Wednesday, May 16, 2012

Thrifted Blinds Project


 I recently purchased a 2-inch set of faux wood blinds from the Habitat Re-store for $3.  When I bought them I wasn't sure exactly what I was going to do with them but I had a lot of spare time this week to complete several projects with them.  I cut the blinds apart so that I had multiple slats of faux wood.  I then painted 4 or 5 slats for each project with a certain saying or Bible verse on them.  After I was done painting, I secured them together with yarn.  The first three projects were simply made using spray paint and acrylic paint for the letters.  The last two projects displayed were made using spray paint, scrapbook paper, sharpies, and mod podge.  They turned out a lot better than I expected.  It was an extremely cheap project and I have not even used half of the slats yet.


Try it out! They make very cute wall decorations!
-Caroline-

Saturday, February 11, 2012

Chair Reuse

A few weeks ago was bulk pickup in our neighborhood. I didn't work that day so I went for a run in the afternoon and saw various people cleaning out their garages and placing the items on the roadside. One of my neighbors had put a few pieces of furniture out so I came home with a chair.


This is close to what it looked like, although I had already taken the cushion and its plastic fabric off of it because it smelled so bad that I just wanted to get rid of it as quick as possible. It took me a little while to finish it up but I washed it, painted it with spray primer, and painted it with about 3 layers of spray paint.


After I let the chair dry a few days, I worked on the seat cushion. I bought a new seat cushion, fashioned it to the wood base, and stapled and nailed a beautiful fabric on it. I nailed the cushion back to it and this is what I got! I'm really excited it is done, it only took me a few weeks! haha.


  I know the pictures are a little dark, but the chair is a beautiful brown color with green and neutral fabric. I plan to sell it, so if you are interested, let me know! Hopefully I will get a brighter picture up soon.

-Brittany-

Sunday, January 29, 2012

Remnants

I always end up having remnants after I make a pillow. Generally they are small but sometimes they are larger like the remains of the Jerusalem fabric. So my mom requested that I make two kidney pillows from the scraps. They might be a little small and long but they look good on my mom's antique sofas. Even if something you design or make isn't the standard (such as the size of these pillows), it can still be good design, so be creative!


-Brittany-

Tuesday, January 24, 2012

Jerusalem Fabrics

On our last day in Jerusalem, we went into the Old City and walked through the markets looking at the various items for sale. We turned down one street and came across a fabric vendor in a room that was about 10'x15' and two stories tall. It was completely packed full of fabrics on the bolt and pre-made pillows and table runners. My uncle had requested that I make him two pink pillows for his black leather couch. So I came across this silk fabric with pink stripes and gold ribbon intertwined next to the stripes. I loved the fabric and got it pretty cheap too! I think the pillows turned out quite well!


-Brittany-


Saturday, January 21, 2012

Melted Creations

A recent crafting fad that I have noticed on multiple crafting websites is melting crayons on canvas.  I thought the idea was neat, so I made a couple of my own melted crayon canvas projects. This first canvas was done by peeling the paper off a particular color scheme of crayons and hot-gluing them to the top of the canvas.  I then made heart stencils and taped them to the canvas. Next step was to blow dry the crayons to cause them to melt.  The last step was to take the stencils off and touch-up the hearts with white paint.


My next canvas was a mixture of several different projects.  In some earlier posts, I showed artwork where I cut a picture out of a canvas with a blade, painted the canvas, and then backed it with black foam board.  Well I combined that style with this new crayon style.  In this next canvas, first I cut out a ukulele with a blade and then I covered the canvas with pages from an old book.  I then hot-glued crayons to the top and melted them with a hairdryer.  The last step was to back the canvas with black foam board and hot glue it into place.  It turned out to look very fiery and rustic. 


HAPPY CRAFTING! 

~Caroline~


Wednesday, January 18, 2012

Israel Interior Architecture

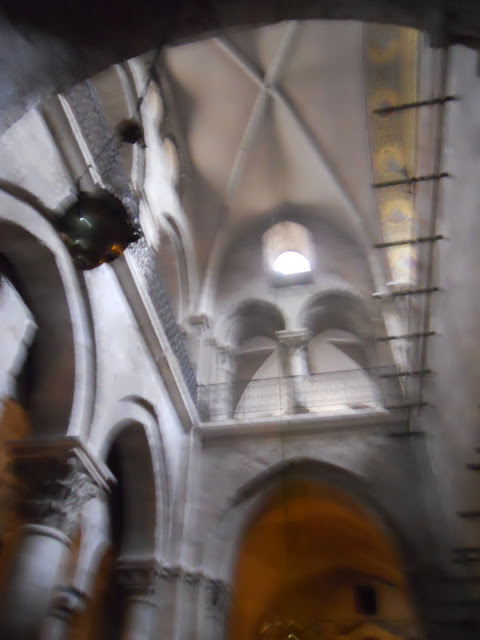
Recently my family and I went to Israel to visit the Holy Land, see archaeological digs and remains, visit Holy sites, and see where Jesus walked and the places he and others in the Bible lived worked and taught in. It was amazing. The people and culture are so different from the United States and the buildings, new and old, are designs you just don't see every day. On this post, I want to display some of the amazing ceilings, which are mostly domes, that we were able to see and experience.
This is the interior of an ancient city gate to Caesarea. Incredible stone work. 

How intricately detailed is this ceiling in Nazareth!

Much simpler wood beams, but still architecturally artistic.

It takes a lot of talent to paint this on a curved ceiling and make it look correct.

Very Rustic. Bethlehem.

Catholic Church in Bethlehem.

This ceiling probably fascinated me the most when I was standing inside looking up. Bethlehem.


I hope these last 5 pictures gave you an idea of how intricately detailed, extremely high and expansive the ceilings are in the Church of the Sepulchre in Jerusalem. 

This was inside the church at the Garden of Gethsemene. So unique and gorgeous. 

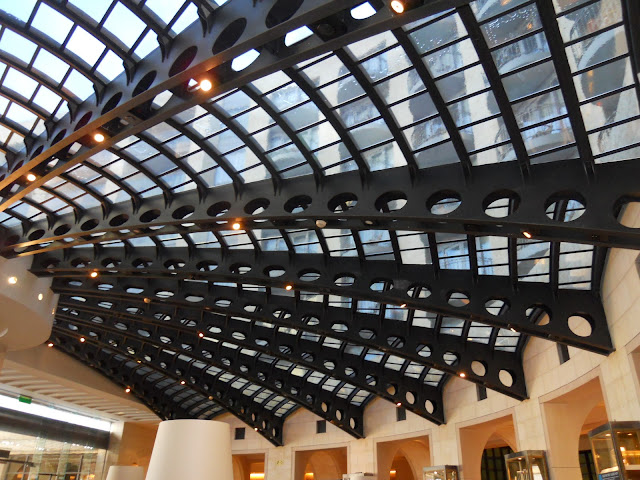
This is one of the ceilings in our hotel in Jerusalem, The David Citadel. Very modern but still in keeping with designs seen throughout the city. 

If only I had enough memory in my camera, I would have taken so many more pictures of architectural details. Hopefully this will give you a taste of some of the craftsmanship that they have in Israel. I'll be posting more pictures of other things in Israel soon! 
Check out my sister's blog for her take on the trip and her photos:

-Brittany-


Tuesday, December 27, 2011

Frosted Vases

For those of you who are on Pinterest, you have probably seen this project. It involves glass vases, rubber bands, and white spray paint. We thought we had to try this because it seems so simple! Put the rubber bands around the vases in any pattern you want, spray paint the vases softly. Let them dry a really long time (like a few days) and then carefully carefully take the rubber bands off. Just a warning, you can smudge the paint if you aren't too careful. 

It would probably be a good idea to coat it all with a clear coat of something, but I'm not sure what yet. Although maybe your white spray paint won't come off as easily as ours did. But anyways, here they are!

Happy Crafting!
-Brittany & Caroline-


Sunday, December 25, 2011

Gift from La Paz, Bolivia!

One of my best friends is a 1st year teacher in La Paz, Bolivia, and when she came home this week to celebrate Christmas, we were able to go out to lunch, catch up, and she gave me this present!


The flowers are made of wool by women living in La Paz and this is their income. As she described to me, it is such a different life down there than it is here in America, and it has reminded me to be thankful for what I have. As you can see, I placed the flowers in a mug that is sitting on our long shelf featuring our mugs and small antique collectables in the family room. Thanks Joy! 
-Brittany-